
Few-Shot Classification
In this chapter, you'll learn how to classify a small dataset of sentences by their sentiment (positive, negative, or neutral), using Cohere's Classify endpoint.
We’ll use Cohere’s Python SDK for the code examples. Follow along in this notebook.
In the text classification space, a trend is emerging where developers and teams are leveraging large language models (LLMs) when building an AI-based classifier system. This is opposed to building a system from scratch on their own, which first, requires the team to have the know-how in machine learning and engineering, and second, requires a huge amount of labeled training data to build a working solution.
With LLMs, instead of having to prepare thousands of training data points, you can get up and running with just a handful of examples per class, called few-shot classification. Think about the sudden drop in the associated costs, time, and effort to collect and build a training dataset. This means that more teams can now think about deploying their own text classification systems, whereas they would not have considered it before.
Let's see how to do this with an example. We'll classify the sentiment of text into a number of classes, say, positive, negative, or neutral. This is useful for applications like analyzing social media content or categorizing product feedback.
For example, a human can easily tell you that “Hello, World! What a beautiful day” conveys a positive sentiment, but let’s see if our models can do that too. And while we’re at it, let’s try classifying other phrases that you might find on social media.
In this chapter, you'll learn to classify text based on sentiment using Cohere's Classify endpoint.
Step-by-Step Guide
To set up, we first import several tools.
import cohere
from cohere import ClassifyExample
We also create a Cohere client.
co = cohere.Client("COHERE_API_KEY") # Your Cohere API key
Step 1: Prepare Examples and Input
A typical machine learning model requires many training examples to perform text classification, but with the Classify endpoint, you can get started with as few as five examples per class. With the Classify endpoint, the input you need to prepare is as follows:
Examples
- These are the training examples we give the model to show the output we want it to generate.
- Each example contains the text itself and the corresponding label, or class.
- The minimum number of examples required is two per class.
- You can have as many classes as possible. If you are classifying text into two classes, that means you need a minimum of four examples, and if you have three, that means you need six examples, and so on.
Inputs
- These are the list of text pieces you’d like to classify.
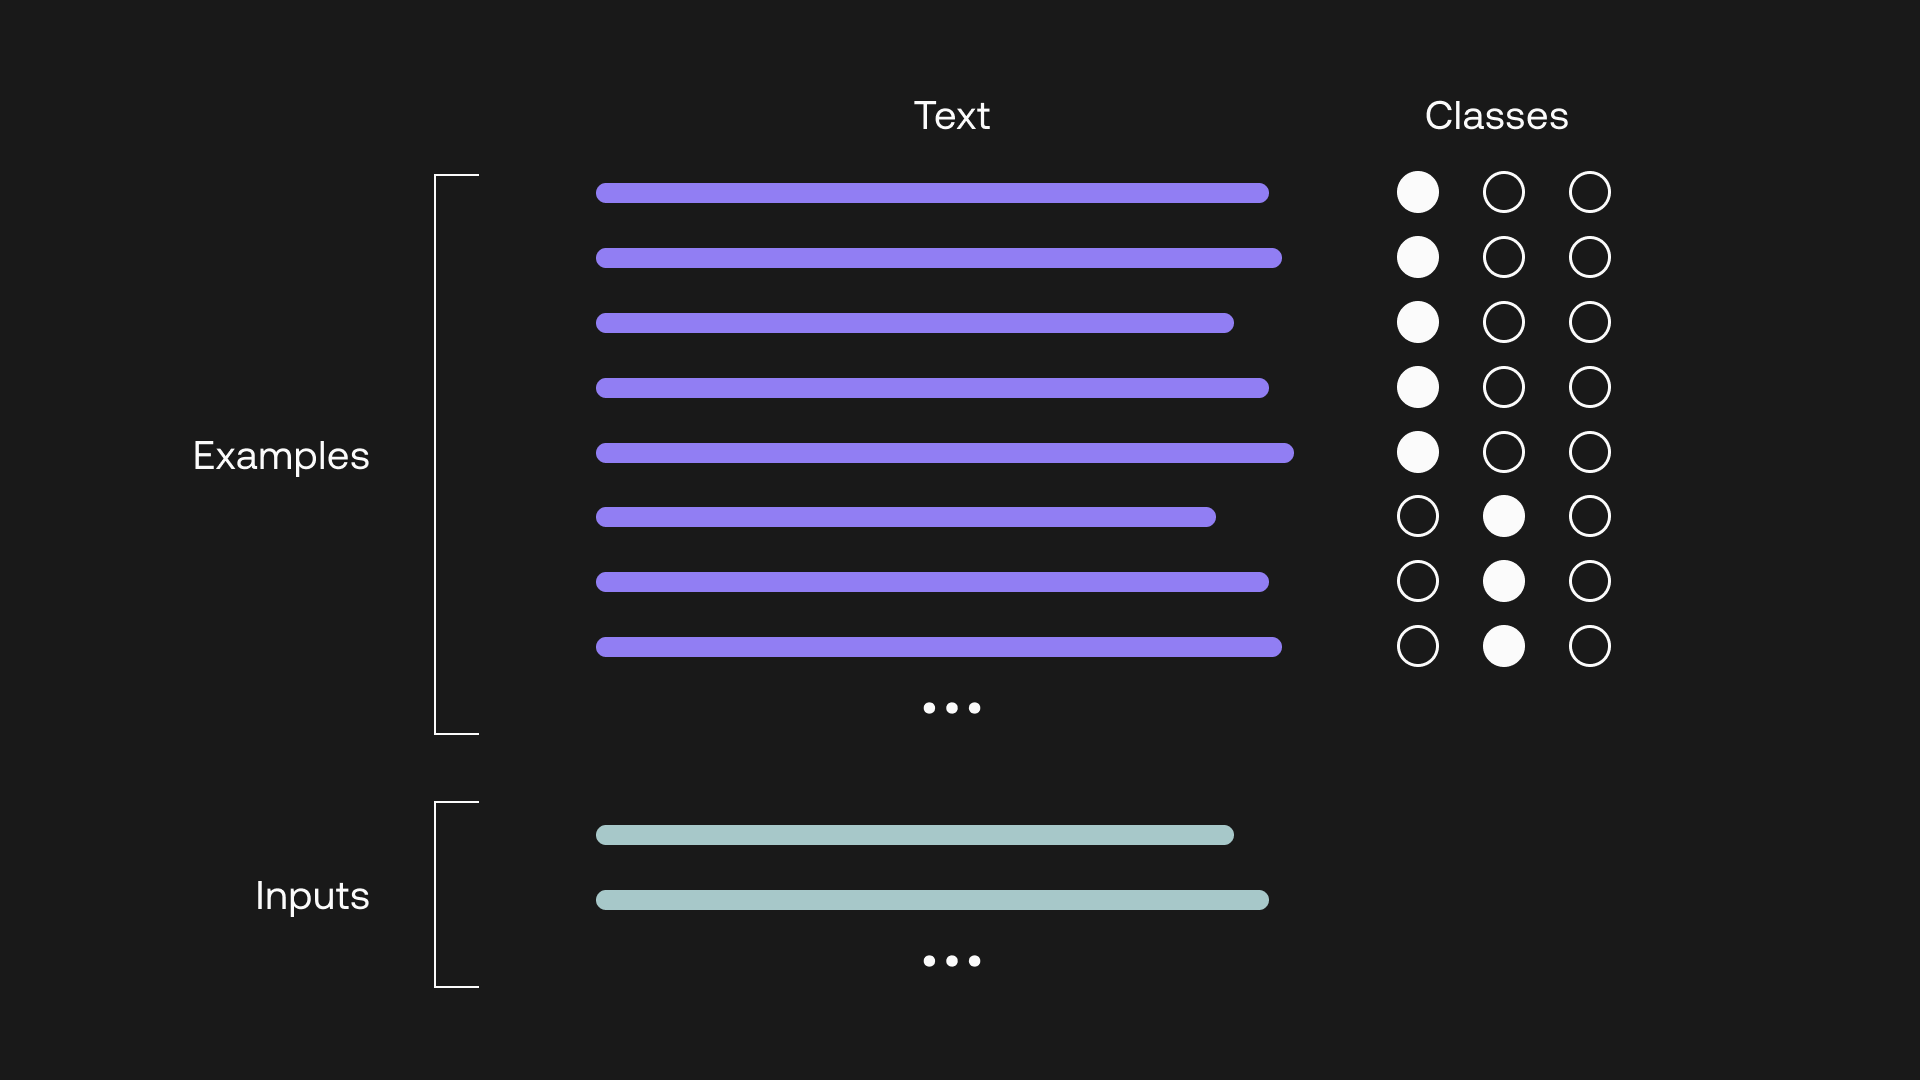
The examples and inputs to a classifier
Our sentiment analysis classifier has three classes with five examples each: “Positive” for a positive sentiment, “Negative” for a negative sentiment, and “Neutral” for a neutral sentiment. The code looks as follows.
The examples:
examples = [ClassifyExample(text="I’m so proud of you", label="positive"),
            ClassifyExample(text="What a great time to be alive", label="positive"),
            ClassifyExample(text="That’s awesome work", label="positive"),
            ClassifyExample(text="The service was amazing", label="positive"),
            ClassifyExample(text="I love my family", label="positive"),
            ClassifyExample(text="They don't care about me", label="negative"),
            ClassifyExample(text="I hate this place", label="negative"),
            ClassifyExample(text="The most ridiculous thing I've ever heard", label="negative"),
            ClassifyExample(text="I am really frustrated", label="negative"),
            ClassifyExample(text="This is so unfair", label="negative"),
            ClassifyExample(text="This made me think", label="neutral"),
            ClassifyExample(text="The good old days", label="neutral"),
            ClassifyExample(text="What's the difference", label="neutral"),
            ClassifyExample(text="You can't ignore this", label="neutral"),
            ClassifyExample(text="That's how I see it", label="neutral")]
The inputs (we have twelve in this example):
inputs = ["Hello, world! What a beautiful day",
          "It was a great time with great people",
          "Great place to work",
          "That was a wonderful evening",
          "Maybe this is why",
          "Let's start again",
          "That's how I see it",
          "These are all facts",
          "This is the worst thing",
          "I cannot stand this any longer",
          "This is really annoying",
          "I am just plain fed up"]
Step 2: Generate Predictions
With the Classify endpoint, setting up the model is quite straightforward. The main thing to do is to define the model type. For the Classify endpoint, we need to use an embedding model, and we'll useembed-english-v2.0.
Putting everything together with the Classify endpoint looks like the following:
def classify_text(inputs, examples):
    """
    Classifies a list of input texts given the examples
    Arguments:
        model (str): identifier of the model
        inputs (list[str]): a list of input texts to be classified
        examples (list[Example]): a list of example texts and class labels
    Returns:
        classifications (list): each result contains the text, labels, and conf values
    """
    # Classify text by calling the Classify endpoint
    response = co.classify(
        model='embed-english-v2.0',
        inputs=inputs,
        examples=examples)

    classifications = response.classifications

    return classifications

# Classify the inputs
predictions = classify_text(inputs, examples)
Together with the predicted class, the endpoint also returns the confidence value of the prediction (between 0 and 1). These confidence values are split among the classes, in this case three, in which the values add up to a total of 1. The classifier then selects the class with the highest confidence value as the “predicted class.” A high confidence value for the predicted class therefore indicates that the model is very confident of its prediction, and vice versa.
Here’s a sample output returned:
Input: Hello, world! What a beautiful day
Prediction: positive
Confidence: 0.84
----------
Input: It was a great time with great people
Prediction: positive
Confidence: 0.99
----------
Input: Great place to work
Prediction: positive
Confidence: 0.91
----------
Input: That was a wonderful evening
Prediction: positive
Confidence: 0.96
----------
Input: Maybe this is why
Prediction: neutral
Confidence: 0.70
----------
Input: Let's start again
Prediction: neutral
Confidence: 0.83
----------
Input: That's how I see it
Prediction: neutral
Confidence: 1.00
----------
Input: These are all facts
Prediction: neutral
Confidence: 0.78
----------
Input: This is the worst thing
Prediction: negative
Confidence: 0.93
----------
Input: I cannot stand this any longer
Prediction: negative
Confidence: 0.93
----------
Input: This is really annoying
Prediction: negative
Confidence: 0.99
----------
Input: I am just plain fed up
Prediction: negative
Confidence: 1.00
----------
The model returned a Positive sentiment for “Hello, world! What a beautiful day,” which is what we would expect! And the predictions for all the rest look spot on too.
Conclusion
In this chapter, you used Cohere's Classify endpoint for sentiment analysis with a simple dataset. This is just one example, but you can classify any kind of text into any number of possible classes according to your needs.
Updated 18 days ago
As your task gets more complex, you will likely need to bring in additional training data and fine-tune a model. This will ensure that the model can capture the nuances specific to your task and realize performance gains. Continue to the next chapter to learn how to do this.