

Quickstart
This quickstart walks you through creating your first vault from the Model Vault app and making an inference request against it. The same flow applies to every vault; the only choice is whether to create a Standard or an Encrypted vault.
Choose a vault type
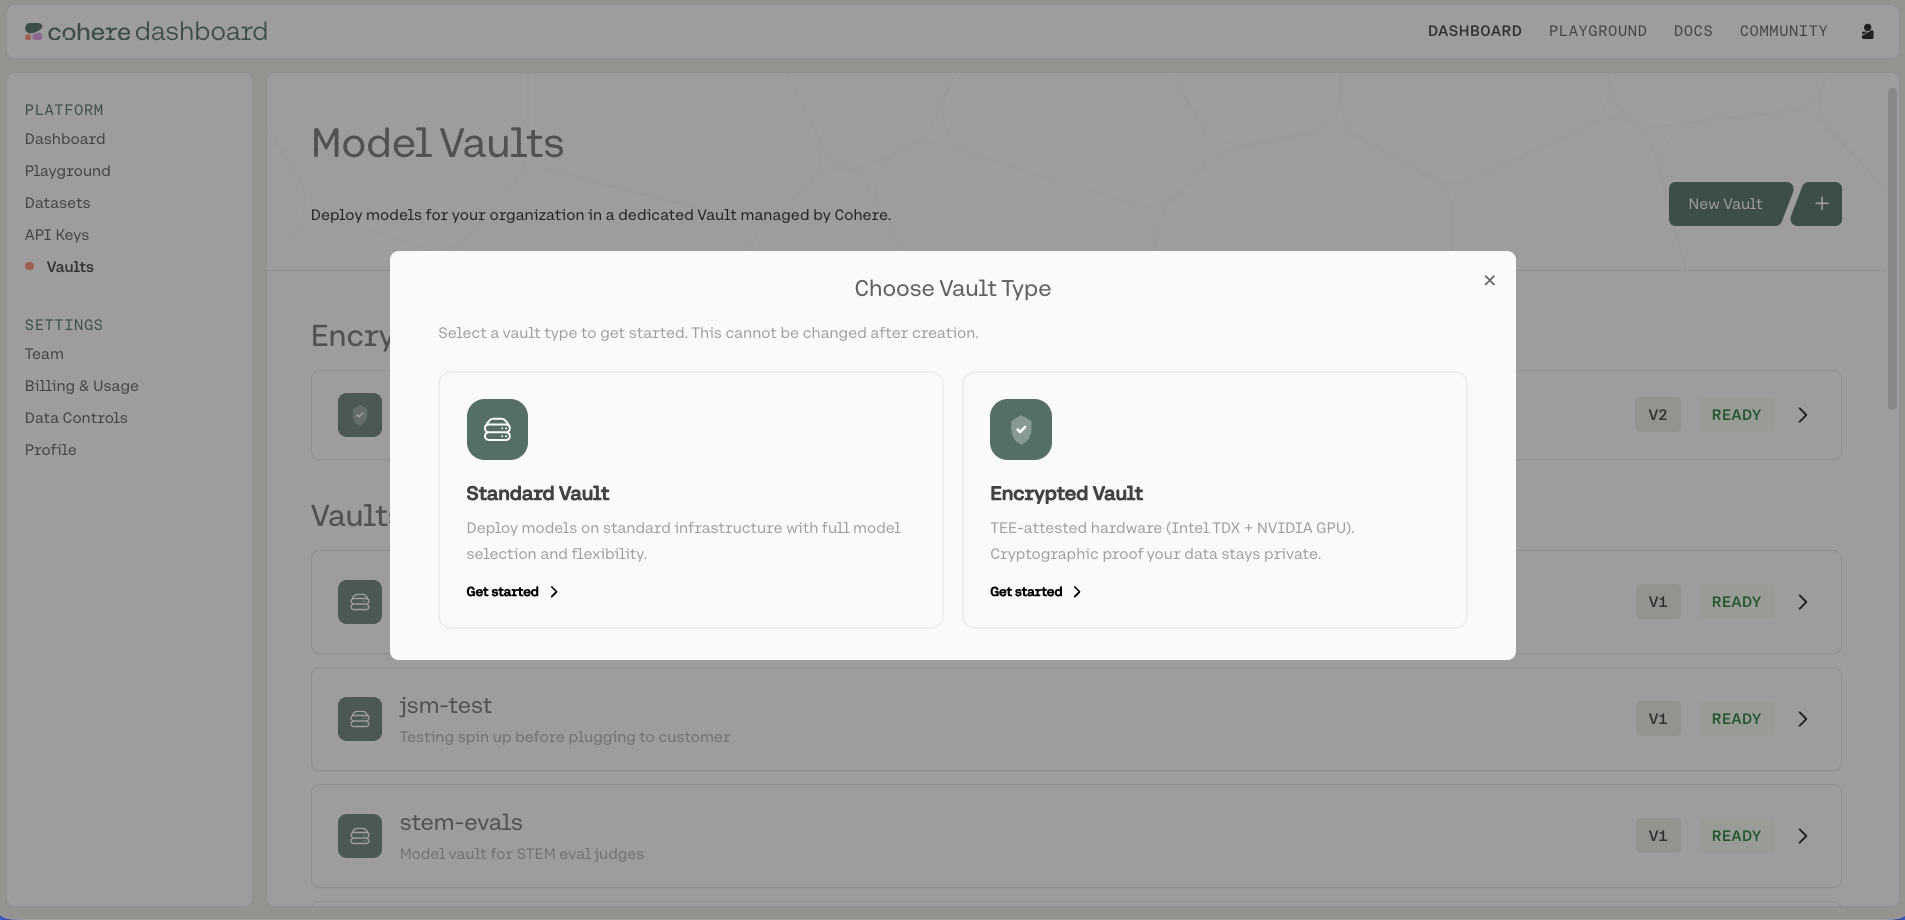
Go to dashboard.cohere.com, open Vaults, and create a new vault. First choose the vault type, Standard or Encrypted (this can’t be changed after creation). Encrypted vaults run inside hardware-backed trusted execution environments and support remote attestation. See Encrypted Vaults.
Select a model and performance tier
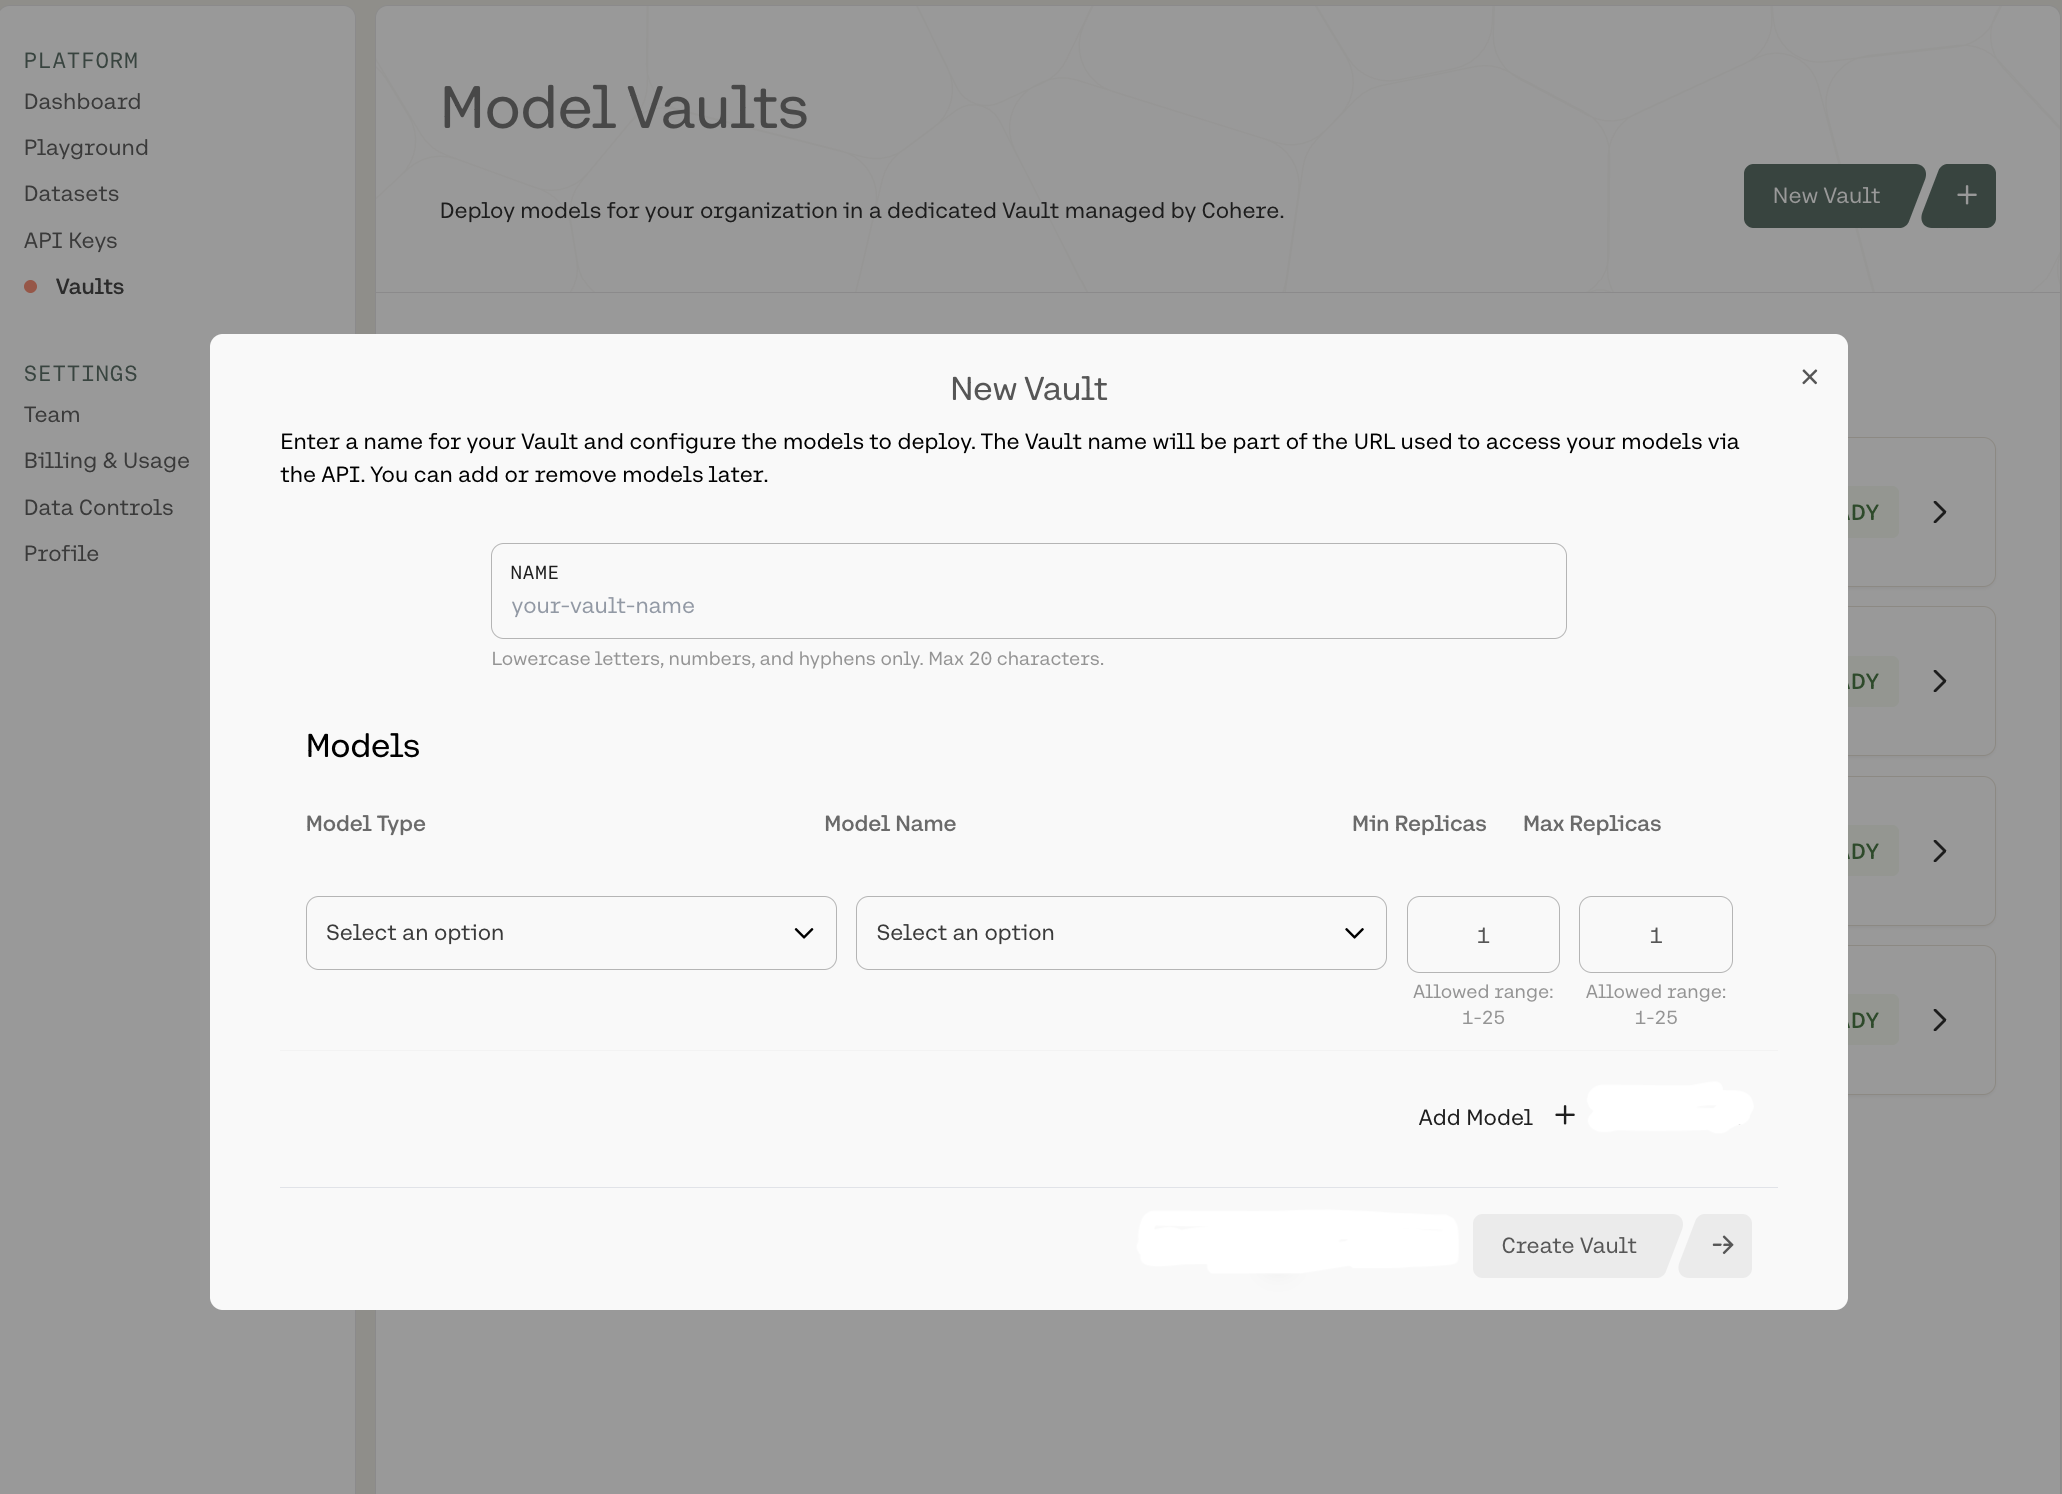
In the configuration panel, name your vault, select a model, and choose a performance tier, then set the replica range. See Creating a Vault for the full walkthrough.
Get your endpoint and model name
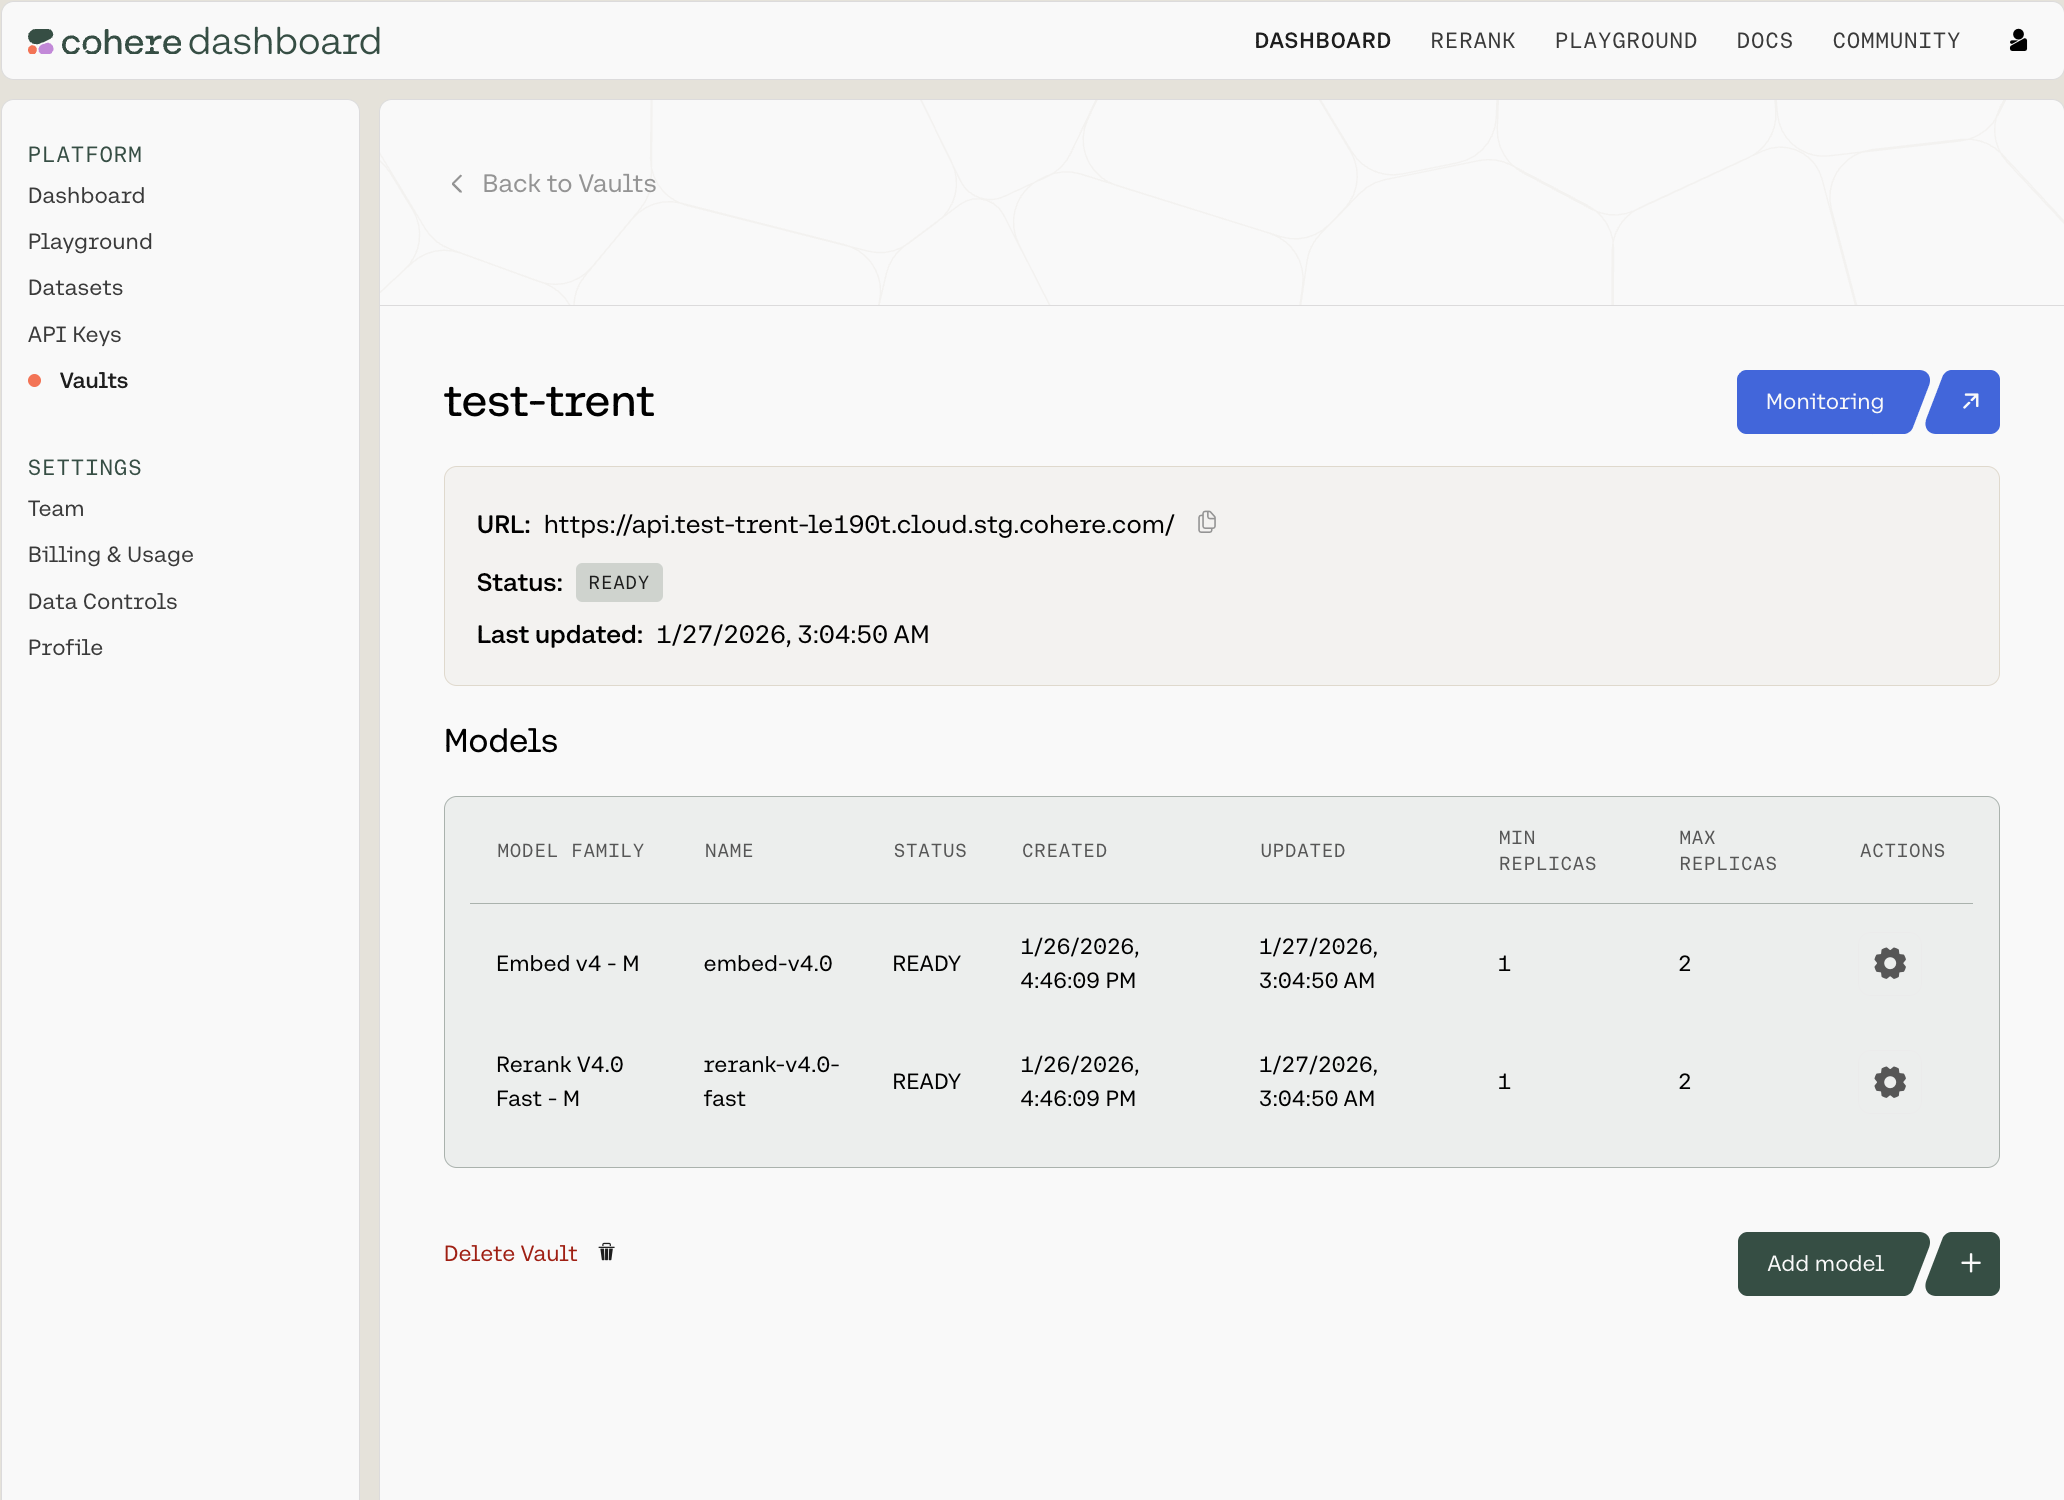
Once the vault status is Ready, open its summary page and copy the endpoint URL and model name. See Calling a Vault over the API.
(Encrypted only) Verify the attestation
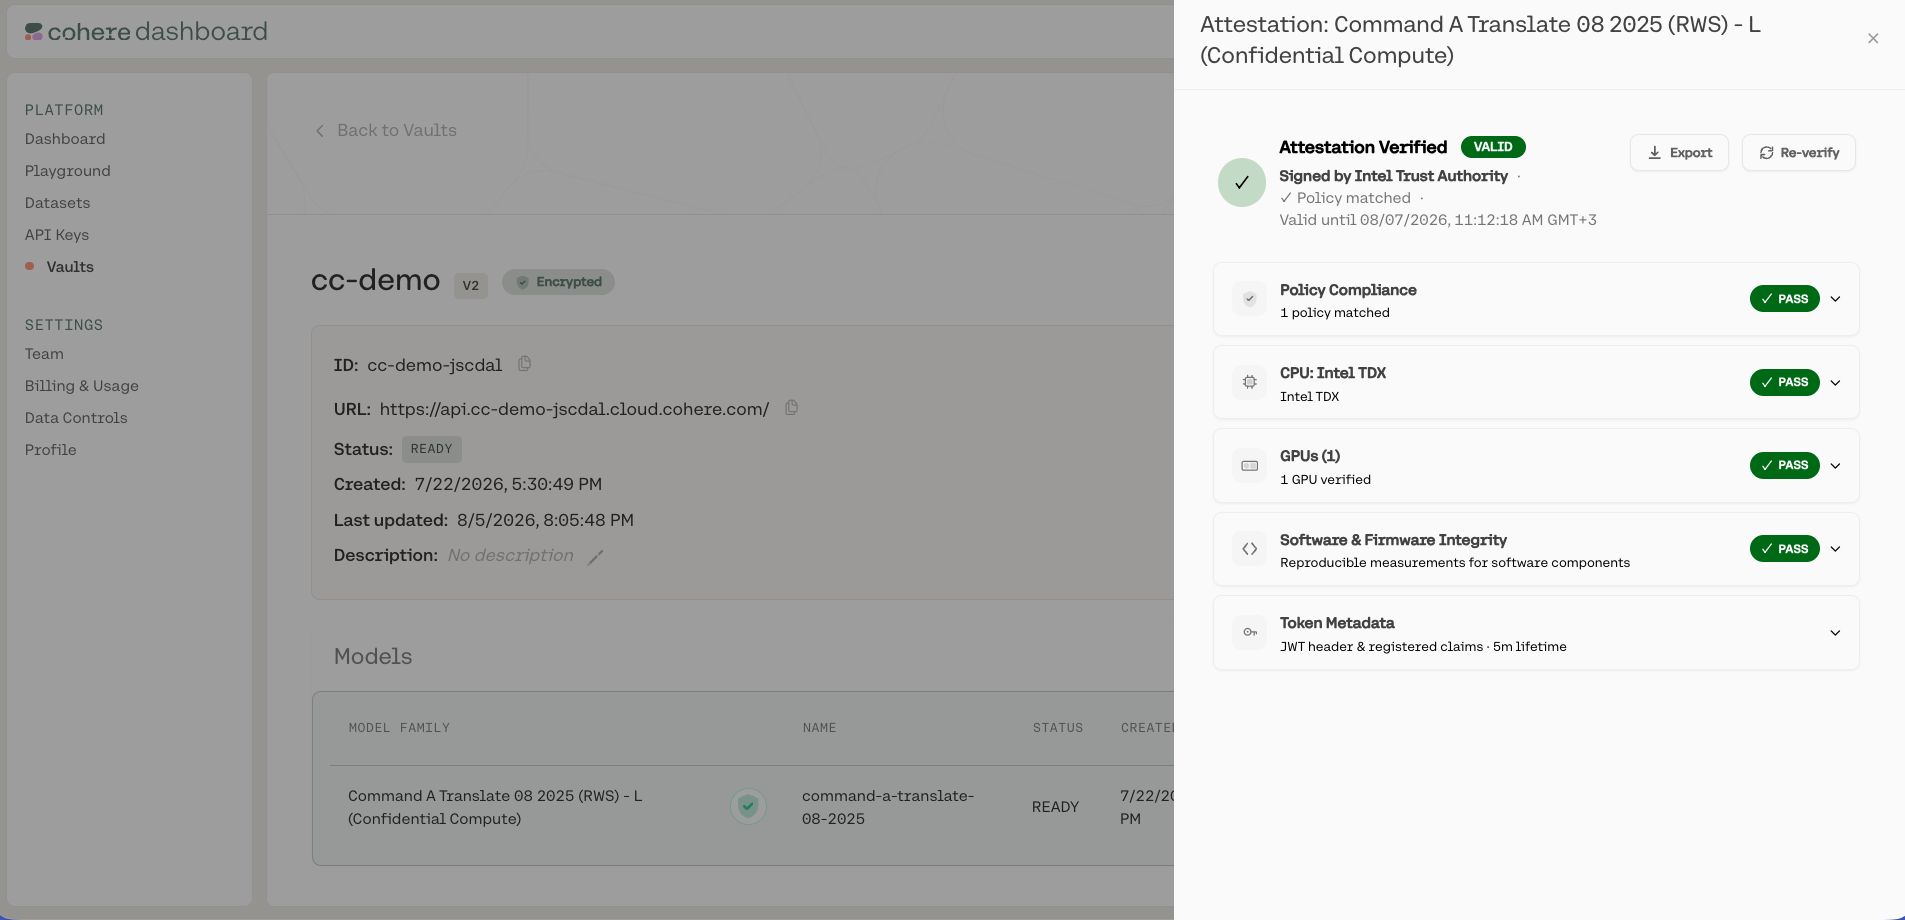
If you created an encrypted vault, the client verifies the deployment’s remote attestation automatically before sending any data, and refuses the connection if it does not pass. You can also inspect the attestation results, the CPU, GPU, software, and policy checks, in the Model Vault app or through the API, so you have proof of exactly what is running. See Verifying Your Deployment and Remote Attestation.
Next steps
- Managing Vaults: view vault details, edit, pause/resume, and delete models.
- Calling a Vault over the API: full request patterns, base URL configuration, and supported endpoints.
- Monitoring: track latency, throughput, and utilization.
- Go deeper on your vault type: Standard Vault or Encrypted Vault.